
*This post may contain affiliate links*
Welcome to round three of The Great Shacket Sew-off! For this round I will be sewing the Lumberjack from Pattern for Pirates. While this pattern is basically one style, it does offer a few different variations, including hood and/or a collar, lined or unlined, and woven or knit cuffs. The website describes the pattern as very oversized and great for layering, even over sweaters.
Price: $12
Sizes included: XXS-5X
*This is also available in children/youth sizing, as well as Men’s sizing but are sold as a separate patterns or as a bundle.
Pattern format: Digital PDF
What is included: Full tutorial, layered pattern pieces, AO files, US Letter pattern pieces / print guide, projector file.
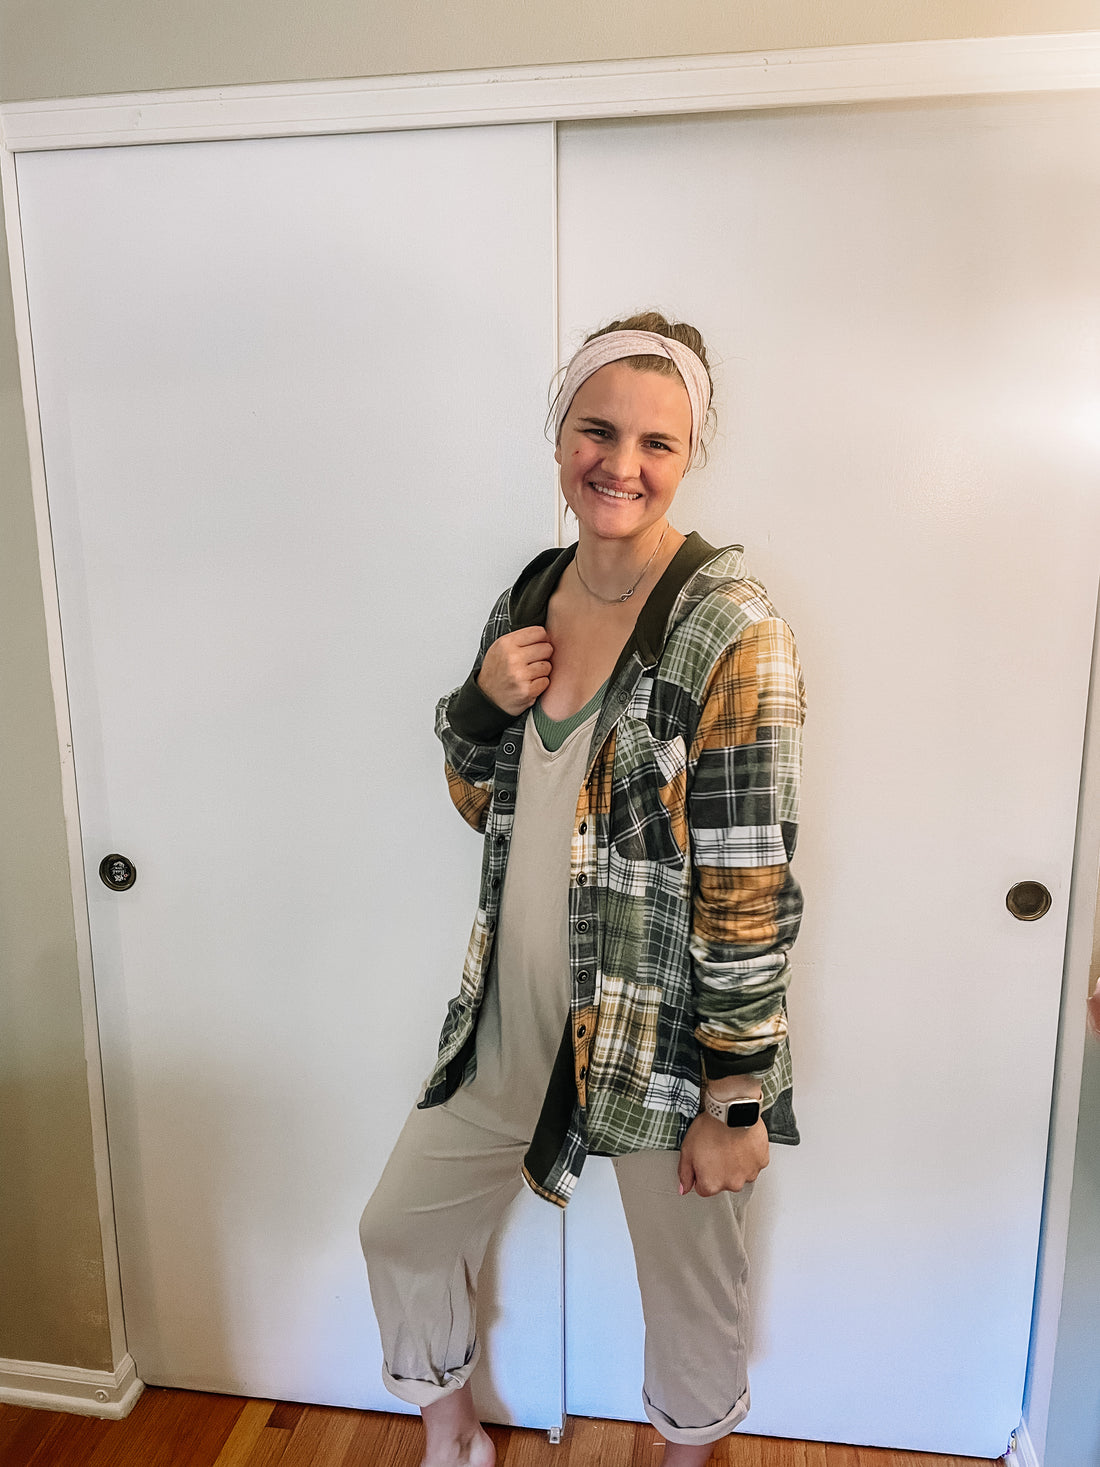
Style and Size Sewn
I went with the large since some of my measurements fell in the large size range and the others were at the very end of the medium range. Also since I am lining it, it will help give me a bit more room! I also added 2” to the body and sleeves to account for my height.
I sewed the lined version with knit cuffs and the hood.
My Measurements
Bust: 37”
Waist: 32”
Hip: 40.5”
Height : 5’9”
Pattern Size Chart

Fabric and Notions
The pattern is drafted for woven/ non-stretch fabrics. The lining can be woven, knit, fleece, sherpa (so basically anything)!
I chose to use a light weight french terry from Mily Mae Fabric for my outer fabric. *This colorway is sold out, but you can find other colorways here.* This had a small 2-way stretch, but found it still worked great! However, I would not use a knit for the woven cuffs or collar!
For the lining I used a solid cotton spandex from Raspberry Creek Fabrics. They have a great selection of solid cotton spandex and it can be purchased by the ½ yard! The also have a great selection of prints and custom printing options!
I used the Dritz ⅝” Long Prong Snaps in Antique Brass for my front closure.
I used about 2.3 yards of each fabric, which were both 55" wide!
Instructions
The instructions are very clear and easy to follow.
There are real life photos for every step to help visual people.
Pattern
Was the finished garment what you expected?
Yes! My finished shacket looked as I expected it to after looking through the photos and line drawings on the site.
What did you like or dislike about the pattern?
- Pros
- It is very simple and quick to sew up!
- I love that it has the option to fully line it or leave it unlined.
- It also has a hood/collar option, allowing you to customize it a bit more
- It has the option for knit cuffs on any style.
- Cons
- There is no guide for cutting the interfacing. Cut guides at the very least would be nice. The instructions just jump to applying the interfacing which could be hard to figure out if you are a beginner.
- The lined version of the pattern is written to have almost no exposed seams, except for the cuffs. The instructions link a blog post about how to construct the knit cuffs without exposed seams, but it seemed very random/ misplaces in the instructions. However, after getting to the written cuff instructions, it is too late to go back and do unexposed seams. The unexposed cuff seams sould be written into the pattern or more information about when you actually need to do the steps for unexposed seams.
- The projector file was not laid out very well. It is very long and narrow, which I found very hard to maneuver when needing the pieces in certain locations to easily cut.
- The way the button placket is constructed, it can get extremely bulky depending on the type of fabrics you are using. It can make adding your closures very hard. While I had no issues with this garment, I have made this pattern (unlined) in the past with a thick fleece lined material and the placket ended up too thick to hold snaps.
- As mentioned above, I have previously sewn the unlined version. The lined and unlined version have different pockets. The unlined pockets were carefully drafted so that they do not hang past the hem of the finished garment, however. I was not a fan. The pockets are huge (they are as wide as each front bodice piece) and I found them to be extremely droopy and annoying.
- The button spacing was way to close. It was about 2.5” apart, but i felt like there ended up being way to many buttons. I would space them out at least one more inch the next time.


Would you make this pattern again?
Yes! I definitely would make this pattern again! I may try a lined version with a woven outer to test out the woven cuffs and collar as well! I would just be sure that my button placket doesn't end up too thick and make the needed adjustments if that was the case. Also, if sewing an unlined version, I would omit the pockets.I would also go down to a size medium so it is bit less baggy! This pattern is very beginner friendly and a quick option!
Have you sewn the Lumberjack Shacket before? If so, what are your thoughts on the pattern? Please share them below if you are comfortable! Also, if you have shared your finished garment on Instagram, please tag me! I’d love to see your beautiful creations!